ArticlePosted on May 2014
Creating Android Lens Blur Depth Viewer
Reading time: 10 minutes
Topics: WebGL, GLSL, three.js, Android
This is a legacy post, ported from the old system:
Images might be too
low quality, code might be outdated, and some links might not work.
Going from an update to the Android camera app to a 3D viewer on the browser, in a few hours and using JavaScript.
The latest update to the Android camera app provides images with embedded depth data. With a bit of engineering and tinkering with an hex editor, a text editor, some JavaScript and a browser, it's easy to get a 3D model representing the original image.
A bit of reverse engineering
A few weeks ago (April 2014) google updated the Android camera app, with a revamped UI and a few nice additions, amongst which there's Lens Blur, a new camera mode to take pictures with depth. It uses a bit of optical flow and other computer vision algorithms to estimate depth out of a picture and video taken with a bit of upwards movement. The resulting image can be used afterwards to perform an effect of shallow depth-of-field, by clicking the area of the picture that you want focused, and specifying the radius of the blur for the blurred parts.
@mrdoob was asking on twitter where that extra depth data was stored, because he couldn't find it in the filesystem. I trust his computer ma skills so if he doesn't find a file he's looking for, it's because it's not there. So where is the depth data stored? The logical answer is "together with the image file, somewhere inside it". So let's all set sail for treasure!
First thing: get a picture taken with the new app to test. I actually had to wait for a while to get the update, but there were several pictures already on the web. They are and look like regular JPEG files.
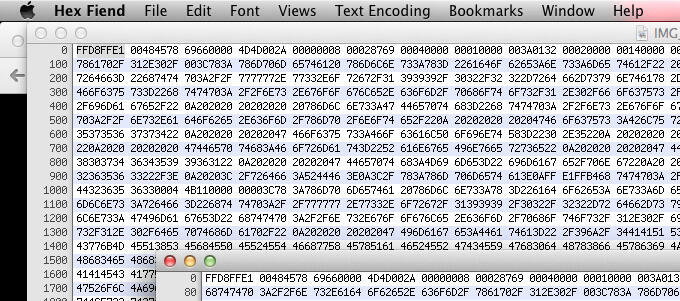
A few years ago I used to work a lot with MJPEG streams and weird video formats based on JPEG sequences with boundaries, so I'm pretty familiar with the JPEG structure of blocks. Using HexFiend to get an idea of the layout of the contents of the file and start working on a loader, extracting pieces and decoding from base64 content that looked promising.
Finding the depth map
Using XMLHttpRequest to load the image as a byte array, we can split it by boundaries, and work with each chunk depending on its content. Some content is binary data, but other is simply a XML-formatted string. There's a couple of interesting blocks of metadata: one contains info about the picture and how it was taken, another info about the actual depth metrics. And contain a base64-encoded string with the depth map.
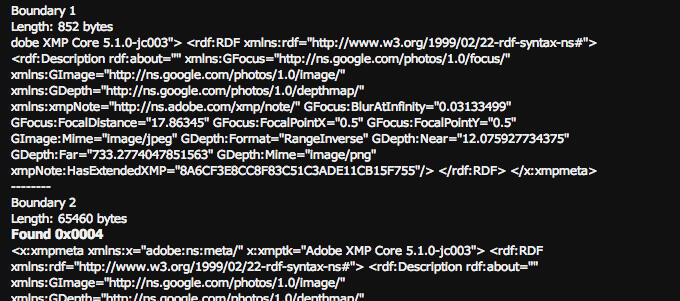
The depth map is a grayscale PNG, with the same dimensiones as the original image. It can be easily extracted and used as source of an image element to display in the browser.
That's where we can start creating a nice little library to extract depth images from Lens Blur pictures.
From image to mesh
The next logical step is to use the color image and the depth image to reconstruct the 3D scene which picture was taken. To do that seems pretty straightforward: we can create a point-cloud, each point being a pixel from the color image. We go over all pixels in the color image and for each pixel we create a vertex where:
- x is horizontal position of the pixel on the image (0 to image width),
- y is vertical position of the pixel on the image (0 to image height),
- z is the pixel from the depth map (0-255)
As said, the depth map is a grayscale image, so each pixel has 256 possible values: depth is encoded as any of those discrete values and it has to be remapped to the right values.
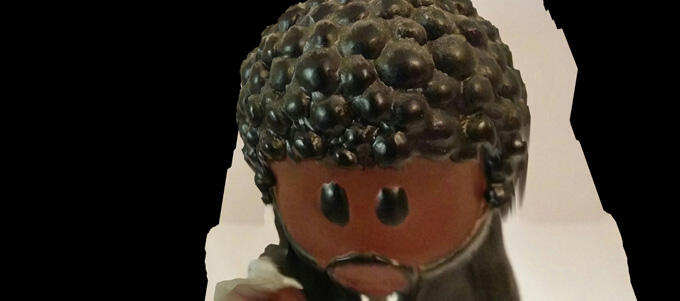
At this point we have the first version of the 3D player, which looks boxy and really not quite right.
Correct mesh reconstruction
First thing, the depth doesn't look correct because it's not stored as a linear value. There are two possible ways XMP stores depth data: RangeLinear and RangeInverse. These are two ways of encoding the distance. The header -and the google documentation- states that is RangeInverse, so the value once read from the byte has to be transformed using ( far * near ) / ( far - value * ( far - near ) ). The far and near value are available on the GDepth header.
Transforming depth in RangeInverse format (take 1, incorrect)
JavaScript - library
var ar = img.height / img.width;
var v = new THREE.Vector3();

for( var y = 0; y < h; y++ ) {
  for( var x = 0; x < w; x++ ) {

    v.x = ( x - .5 * w ) / w;
    v.y = ( y - .5 * h ) / h;
    p = Math.round( ( ( -v.y + .5 ) ) * ( img.height - 1 ) ) * img.width * 4 +
      Math.round( ( ( v.x + .5 ) ) * ( img.width - 1 ) ) * 4;

    var dn = imageData.data[ p ] / 255;
    var rd = ( far * near ) / ( far - dn * ( far - near ) );
    v.z = -rd ;

  }
}
That way the depth is correctly expanded, but there's still something amiss.
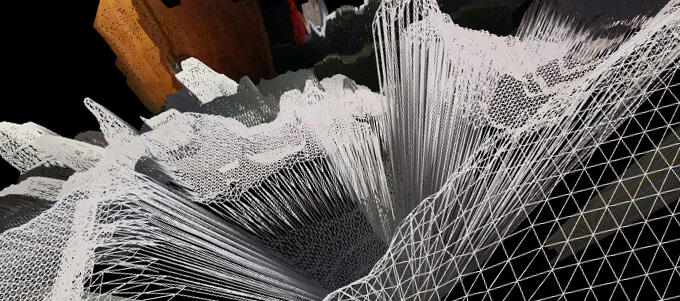
Again, @mrdoob comes to the rescue suggesting that the reconstructed geometry should look more like a pyramid section rather than a cube. And of course makes perfect sense, since the camera behaves as a perspective transform matrix. Thanks to @kcimc code from kinect reconstruction, I was able to correctly reconstruct the scene, by multiplying x and y by a factor of z.
Transforming depth in RangeInverse format (take 2, correct)
JavaScript - library
var ar = img.height / img.width;
var v = new THREE.Vector3();

for( var y = 0; y < h; y++ ) {
  for( var x = 0; x < w; x++ ) {

    v.x = ( x - .5 * w ) / w;
    v.y = ( y - .5 * h ) / h;
    p = Math.round( ( ( -v.y + .5 ) ) * ( img.height - 1 ) ) * img.width * 4 +
      Math.round( ( ( v.x + .5 ) ) * ( img.width - 1 ) ) * 4;

    var dn = imageData.data[ p ] / 255;
    var rd = ( far * near ) / ( far - dn * ( far - near ) );
    v.z = -rd ;
    v.x *= rd * 1;
    v.y *= rd * ar;

  }
}
There's more code in this loop, but mainly takes care of sampling the colour of the image, and to track the farthest and closest depth value to place the object in the scene correctly once reconstructed.
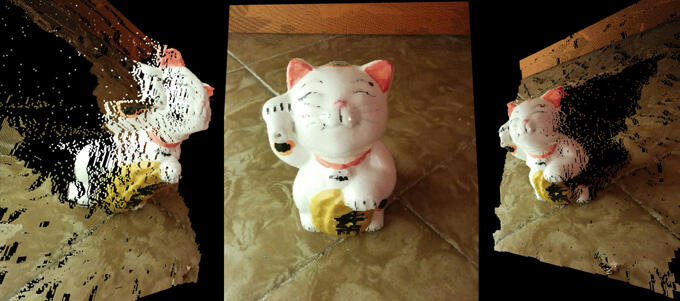
Adding more rendering modes
Once the point cloud is working, the rest is easy. A plane can be created to have as many vertices as necessary, and those vertices displaced by the xyz values reconstructed from the depth map. That plane can then be shown as wireframe, or as a textured solid object.
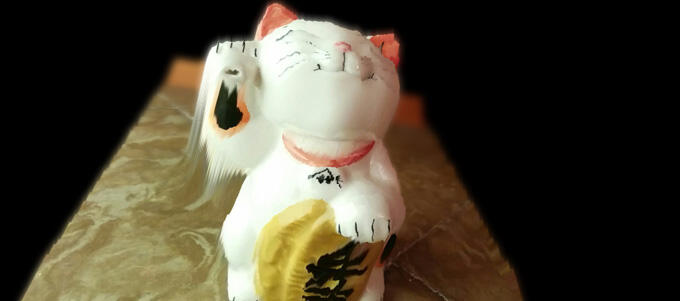
Textured, though, shows the problem of using the already blurred image from Lens Blur: some parts are blurry even though we don't want them to be. But considering that the Lens Blur app applies blur at the user's command, it makes sense that there's an original image also embedded in the file. And there is, it's in the GImage:Data node. We can use that one to reconstruct an unblurred scene.
A bit of blurring of the depth map, using StackBlur also help smoothing the reconstructed depth, because most of the images have plenty of artifacts from the method used to calculate depth.
The rest are finishing touches: a better UI with text and progres indicator, some default example images, a few controls to tweak stuff around.
Adding the Sketchfab exporter
I also thought it would be useful to export the model once reconstructed. Taking the THREE.ObjectExporter class, it was easy to add an exporter for the basic geometry.
The guys at @sketchfab suggested adding an uploader to their site. There were a couple of samples of code.
First step, trying the basic .OBJ uploader. That worked pretty easily. It revealed a couple of bugs in the reconstruction of the mesh: basically there were some NaN position that three.js ignores, but sketchfab considers 0.
Second step, since the basic geometry is pretty boring, and we have the diffuse map, so how to upload it? It requires a zip file with an .obj file, the texture, and a .mtl file to describe the material.
First, I asked @Sejnulla for a sample of an exported file from Maya. Then, modified the THREE.ObjectExporter to add the required material strings. Using zip.js to compact the three files into a single one, and uploading it to @sketchfab. Done!
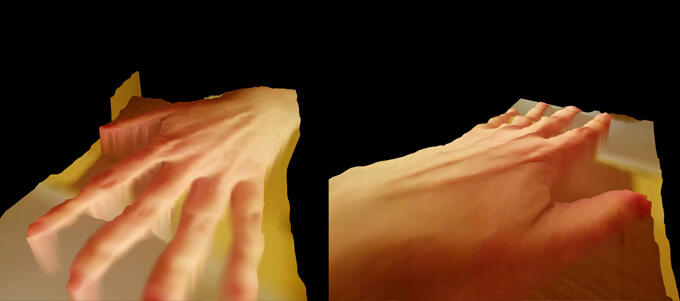
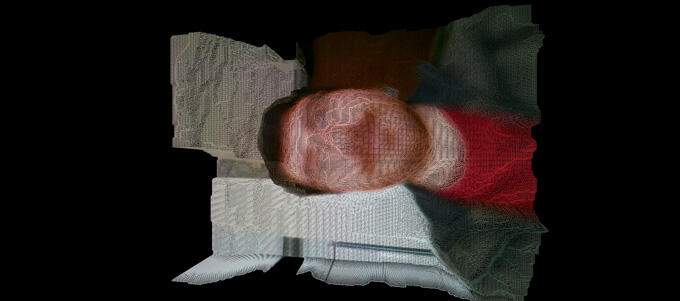
Here are a couple of examples of meshes generated from an Android Lens Blur image and uploaded directly to SketchFab from the browser.